Core skills for digital accessibility: Headings
October 06, 2025
Cookie Acknowledgement
This website uses cookies to collect information to improve your browsing experience. Please review our Privacy Statement for more information.
Digital accessibility means making sure that all our digital content — including websites, electronic course materials, mobile apps and online documents — can be used and understood by everyone, including people with disabilities. It’s about using Universal Design so that all students, faculty, staff and visitors can fully participate in university activities, programs and services.
In April 2024, the U.S. Department of Justice finalized a new rule that explicitly outlines how public entities must ensure their digital offerings are accessible. The rule mandates compliance with the Web Content Accessibility Guidelines (WCAG) 2.1, Level AA, a widely accepted international standard for digital accessibility.
Improving headings is just one of the ways we can make digital design more effective.
Headings and subheadings are essential components of accessible design. Most web pages and documents contain a main heading to indicate the title or primary topic, with subheadings marking the beginning of new sections. Visually, headings are typically displayed in a larger and bolder font than regular text.
The use of headings supports all users by maintaining organizational structure and facilitating the efficient location of specific information.
The user of a screen reader benefits from headings when the headings are accurately identified as such (Heading 1, Heading 2, etc.) using the heading features provided by the authoring tool. Headings are used to outline page content, with Heading 1 indicating the main heading and Heading 2 designating the first level of sub-headings. This structure helps screen reader users understand the organization of the page.
Screen readers are equipped with features that allow users to efficiently navigate between headings using single keystrokes or to access a hierarchical outline of the page generated from its heading structure. These capabilities enable individuals utilizing screen readers to move within a webpage with efficiency comparable to that of sighted users.
Explore the best practices for creating headings in these popular authoring tools.
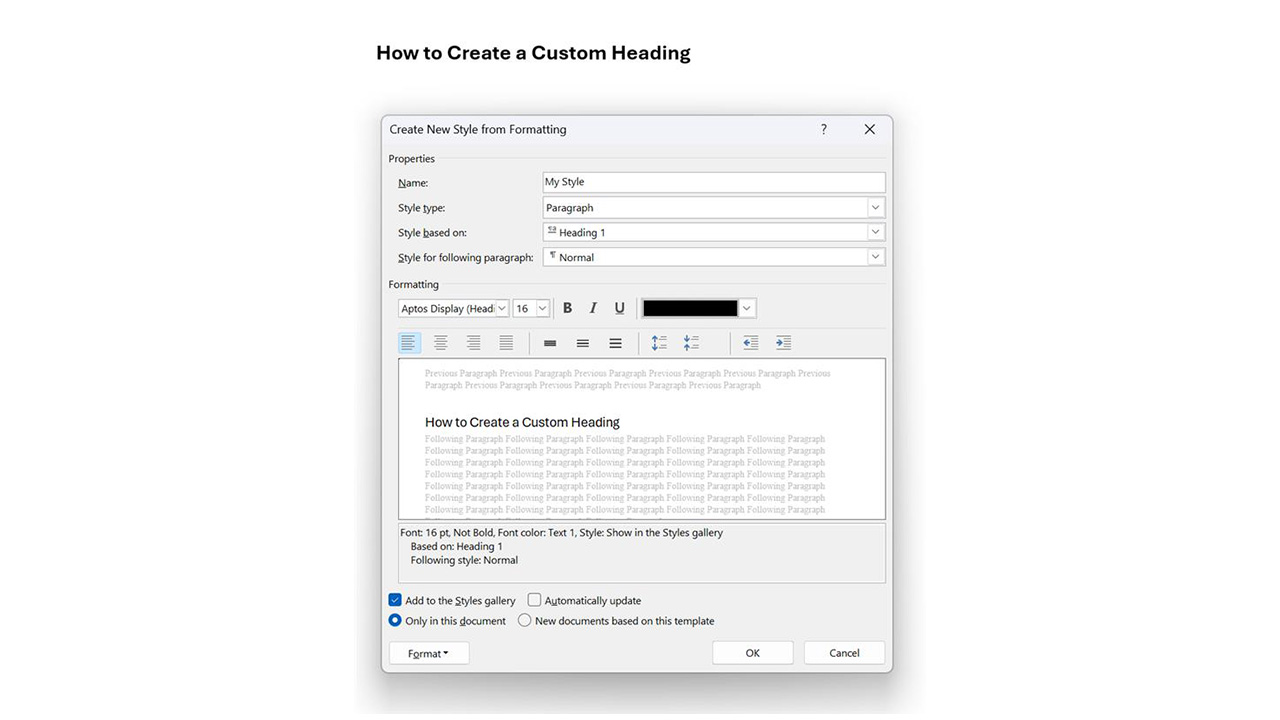
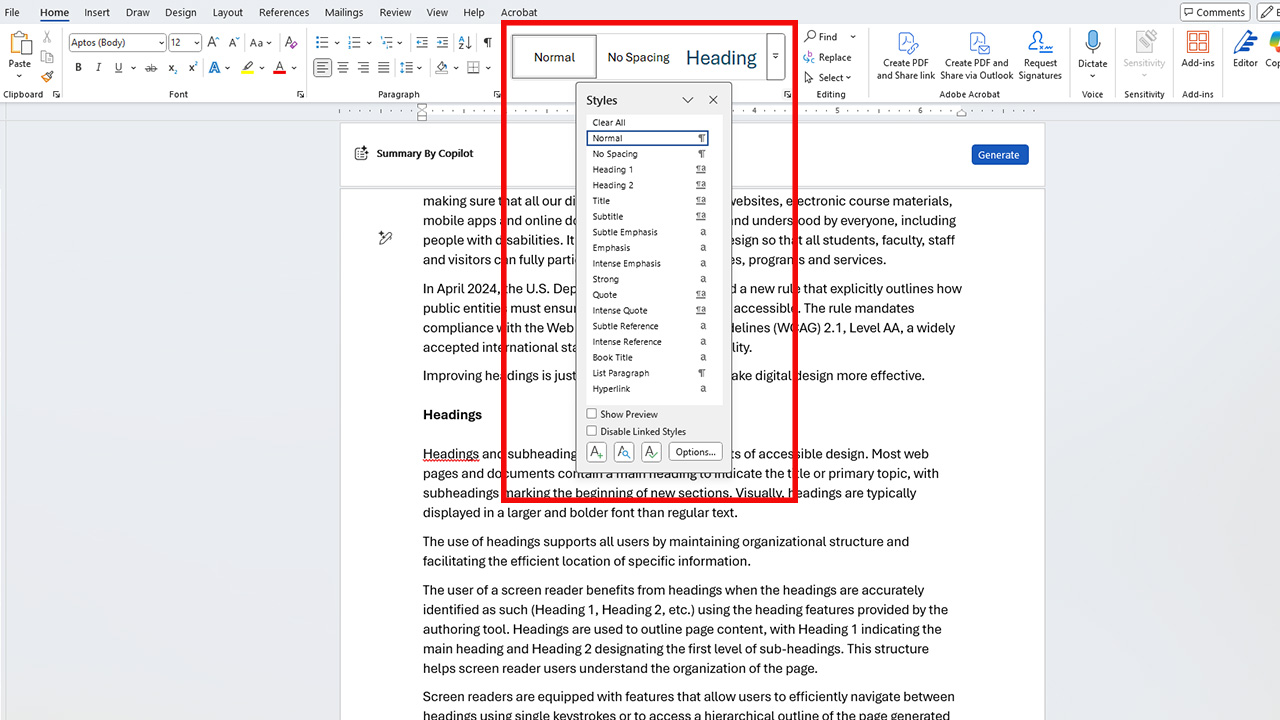
Microsoft Word: Add headings using the built-in heading styles (Heading 1, Heading 2, etc.) available in the Ribbon. Right-click on the style button and select “Modify” to modify the appearance of any of the heading styles.
Adobe Acrobat Pro DC: When a PDF document is generated from an authoring tool that includes support for headings and tagged PDF export (such as Microsoft Word), and these features are properly applied during document creation, the heading structure will typically be retained in the resulting PDF file. You can confirm or edit these headings by using the Tag Tree (From the View menu, select Show/Hide > Navigation Panes > Tags) or by using the Reading Order Tool. Read more about the Reading Order Tool.
Canvas: In Canvas, headings are chosen from the Blocks selector located on the toolbar, with “Paragraph” set as the default option. It is important to note that Canvas automatically designates Heading 1 for the page title; therefore, Heading 2 is the first heading level available in the rich content editor. For the main content, all top-level headings should utilize Heading 2. If sub-headings are required, apply Heading 3 or Heading 4 appropriately, ensuring that the heading levels reflect a logical outline of the page and do not skip any levels.
HTML: Use <h1> for the main heading of the page. For most pages, there will be only one <h1>, marking the content that is unique on that page. The name of the website, which is often shown at the top of each web page within a website, does not need to be tagged as a heading at all. Use <h2> for subheadings beneath the main heading. Use additional levels of headings (<h3> through <h6>) as needed if for additional levels of sub-headings within the web page content.